
Maybe you already have a phone you like. It holds your photos, your contacts, and it feels right in your hand. So when you hear about the free government phone program, one question comes up fast: Do I have to trade in my phone, or can I keep it?
Good news – in most cases, you can keep it. It’s called Bring Your Own Phone, and it lets you put a Lifeline plan right onto the phone you already own. No new device to learn. No losing your stuff. Same free monthly service.
I’ve spent a lot of time reading provider rules and standing beside enrollment reps at sign-up tables, and I’ll be honest with you: bringing your own phone is simple once you know the steps – but a few small details trip people up. This guide walks you through the entire BYOP process: what it is, whether your phone will work, which companies allow it, and how to set it up without losing your phone number.
First, what does “Bring Your Own Phone” actually mean?
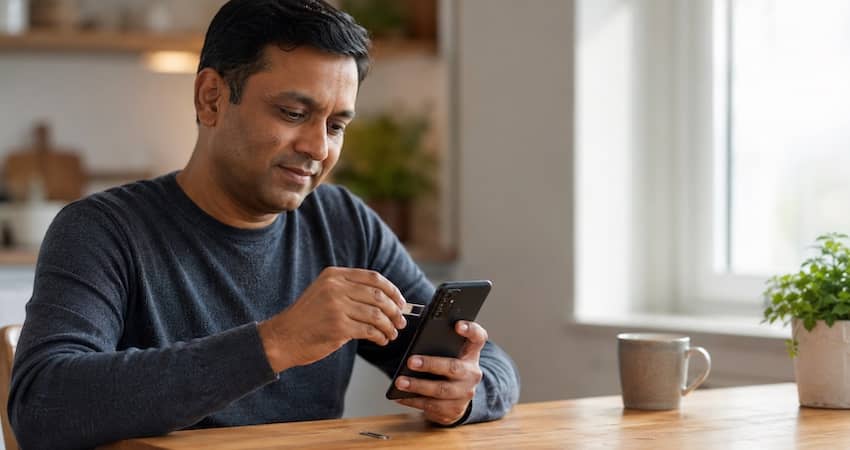
“Bring Your Own Phone” (you’ll also see it written as BYOP or BYOD, short for “Bring Your Own Device”) is exactly what it sounds like. Instead of getting a free phone from a Lifeline provider, you keep the phone you already have. The provider gives you a SIM card – a small chip that connects your phone to their network – and turns on your free Lifeline plan.
So you end up with:
- The same phone you already know
- Free monthly talk, text, and data (the amount depends on the provider)
- A free SIM card or eSIM from most providers
One thing to be clear about from the start: BYOP gives you free service, not a free phone. The Lifeline benefit pays for your monthly plan. It does not pay for buying a phone. If you don’t have a phone yet, you’re usually better off taking the free one – I’ll cover that choice near the end.
The part people skip: you still have to qualify for Lifeline
Before you think about your phone, start here. BYOP is not a separate program. It’s just a way to use your Lifeline benefit. So you have to qualify for Lifeline first, the same as anyone getting a free phone.
There are two ways to qualify:
1. Through a program you’re already in. You qualify if you (or someone in your home) takes part in programs like:
- SNAP (food stamps / EBT)
- Medicaid
- Supplemental Security Income (SSI)
- Federal Public Housing Assistance
- Veterans Pension or Survivors Benefit
- Certain Tribal programs
2. Through your income. You qualify if your household income is at or below 135% of the Federal Poverty Guidelines. The exact dollar limit depends on how many people live in your home.
Remember, too, that Lifeline gives one benefit per household – not one per person.
If you’re not sure whether you qualify, our Lifeline eligibility guide breaks down every rule and income limit for 2026. Once you know you qualify, come back here and let’s check your phone.
Before anything else: 3 things your phone needs
Not every phone can join a Lifeline network – but most modern smartphones can. Your phone needs to pass three checks:
- It must be unlocked (not tied to another company).
- It must be compatible with your provider’s network.
- It must have Wi-Fi. The FCC requires every phone used with Lifeline to have Wi-Fi capability.
Let’s take these one at a time, because this is where the real answers live.
Is your phone unlocked?
A “locked” phone is tied to the company that sold it. Think of it like a lock on a door – the phone will only accept a SIM card from that one carrier. Before you can bring it to a Lifeline provider, that lock has to come off.
Here’s how to check.
On an iPhone:
- Open Settings
- Tap General
- Tap About
- Scroll down to Carrier Lock
- If it says “No SIM restrictions,” your phone is unlocked
On an Android:
- Open Settings
- Tap Connections, then Mobile Networks
- Tap Network Operators
- If you see several carrier names to choose from, your phone is probably unlocked. If you see only one, it may be locked.
If your phone is locked, don’t give up. Call the company you bought it from and ask them to unlock it. A couple of things to know: you may have to pay off any balance on the phone first, and it can take a few days for them to unlock it. Once it’s unlocked, you’re free to switch.
I once watched a man at a sign-up table get turned away because his phone was still locked to his old carrier. He was frustrated – but one phone call to that carrier the next day fixed it, and he came back and enrolled. Locked doesn’t mean “no.” It usually just means “not yet.”
How to find your IMEI and check compatibility
Every phone has a 15-digit ID number called an IMEI. Providers use it to check whether your phone will work on their network. Finding it takes about ten seconds.
The fastest way: open your phone’s keypad and dial *#06#. Your IMEI pops right up on the screen.
You can also find it here:
- iPhone: Settings → General → About → scroll to IMEI
- Android: Settings → About Phone → Status → IMEI
- Or look on the phone’s box, or on the SIM card tray
Once you have your IMEI, go to your chosen provider’s website and find their “Bring Your Own Phone” or “Check Compatibility” tool. Type in the IMEI, and it will tell you if your phone works on their network.
One honest warning, because a lot of guides leave this out: the compatibility checker tells you if your phone can connect to the network. It does not tell you if your phone is unlocked, and it doesn’t always promise that every single feature – like picture messages – will work perfectly. So make sure your phone is unlocked and passes the IMEI check. Both matter.
Why the network matters (and what happens with older phones)
Here’s a simple version of something that sounds technical.
Lifeline providers don’t build their own cell towers. They rent space on the big networks – mostly T-Mobile, sometimes Verizon or AT&T. Your phone has to match the network your provider uses.
- Most Lifeline providers run on T-Mobile. For these, you need a GSM-unlocked phone. (Assurance, TruConnect, AirTalk, TAG Mobile, Gen Mobile, and others use T-Mobile.)
- SafeLink runs on Verizon. For SafeLink, you need a phone that works on Verizon.
- A few providers use AT&T in some areas.
There’s one more thing to know if your phone is old. Years ago, some phones were built only for the old “CDMA” networks – the old Sprint and older Verizon phones. Those networks have been shut down. So a very old CDMA-only phone usually won’t work anymore, no matter what. If your phone is more than a few years old, the IMEI check is the quickest way to find out for sure.
The good news: most smartphones made in the last several years support many networks. The odds are in your favor.
Which Lifeline providers let you bring your own phone?
Not every provider allows BYOP, and not every one makes it easy. Based on current provider pages, here are well-known Lifeline companies that support bringing your own phone:
| Provider | Underlying network | BYOP notes |
|---|---|---|
| Assurance Wireless | T-Mobile | Free SIM or eSIM; check your IMEI on their site |
| TruConnect | T-Mobile | Popular BYOD option; free SIM |
| StandUp Wireless | T-Mobile | Built around BYOD — bring your own or buy a low-cost phone (no free phone) |
| AirTalk Wireless | T-Mobile | Free SIM and eSIM; also offers free phones |
| TAG Mobile | T-Mobile | BYOP available in many states |
| Gen Mobile | T-Mobile | BYOD-friendly |
| SafeLink Wireless | Verizon | Needs a Verizon-compatible phone |
| Life Wireless | Varies by area | BYOD available |
| Cintex Wireless | Varies by area | BYOD available |
| Access Wireless | Varies by area | BYOD available |
Provider offers change often, and not every provider serves every state, so always confirm on the provider’s own website before you apply. If you want help comparing them side by side, see our best Lifeline providers guide.
SIM card or eSIM — which will you get?
To connect your phone, you need one of two things:
A physical SIM card. This is the small chip you slide into your phone. Most providers mail it to you for free after you’re approved. It usually arrives in about 3 to 5 business days.
An eSIM. This is a digital SIM – nothing to slide in. If your phone supports it (most newer iPhones and Samsung phones do), the provider sends you a QR code by email. You scan it over Wi-Fi and you’re connected in minutes – no waiting on the mail.
Not every provider offers eSIM yet, but the big ones like Assurance and AirTalk do. If you’re in a hurry and your phone supports it, eSIM is the fastest path.
The first time I set up an eSIM, I honestly expected a headache. Instead, I scanned a code, waited about a minute, and watched the signal bars fill in. For anyone who hates waiting on the mail, that’s a small relief.
How to bring your own phone to Lifeline, step by step
Here’s the whole process from start to finish. It’s the same basic path with almost every provider.
- Make sure you qualify for Lifeline (see the eligibility section above).
- Check that your phone is unlocked. Fix it with your old carrier if it’s not.
- Find your IMEI (
*#06#) and run it through the provider’s compatibility checker. - Apply on the provider’s official website. When it asks about a phone, choose “Bring Your Own Device” instead of the free phone.
- Upload your proof. You’ll need a photo ID and proof that you qualify — like a benefit letter or an income document.
- Wait for approval and your SIM. A physical SIM comes by mail; an eSIM comes by email as a QR code.
- Put in the SIM (or scan the eSIM QR code).
- Follow the activation steps the provider gives you.
- Set up your APN if your data doesn’t work right away (more on this next).
- Test it. Make a call, send a text, and open a web page to be sure everything works.
That’s it. Most people are up and running the same day their SIM arrives.
Setting up APN (so your internet and picture messages work)
Sometimes after you activate, calls and texts work but the internet doesn’t. Don’t panic – you usually just need to enter your APN settings.
APN stands for “Access Point Name.” It’s a small set of settings that tells your phone how to reach the internet through your provider. Think of it as the address your phone uses to find the data road.
Your provider will give you the correct APN values – usually by email or on their website. You type them into your phone’s settings, save, and restart. Your data (and your picture messages) should start working. Each provider has its own values, so use the ones from your provider. Many of our provider guides include the exact APN steps for that company.
How to keep your current phone number
This is the question I hear most: “Will I lose my number?” Almost always, the answer is no. You can bring your number with you. Moving a number from one company to another is called porting, and it’s your legal right.
To transfer your number, have this ready from your old carrier:
- Your old company’s name
- Your old account number
- Your old account PIN or password
- The phone number you want to keep
A few tips to make it smooth:
- Back up your contacts, texts, and voicemail first, just in case.
- Don’t cancel your old service yet. During the switch, your phone may work on both networks for up to 24 hours. Wait until your new provider confirms the transfer is done before you cancel the old plan. If you cancel too early, you can lose the number.
We cover this in detail – including how long it takes and what to do if a transfer gets stuck – in our guide on how to keep your phone number when switching Lifeline providers. And if you’re moving from one Lifeline company to another, our how to switch Lifeline providers guide walks through the whole thing.
Common compatibility problems (and how to fix them)
If something goes wrong, it’s usually one of these. Here’s the quick fix for each.
“My phone failed the compatibility check.” It may be locked, or it may be an older phone that doesn’t match the network. Confirm it’s unlocked first. If it’s very old, it may be time to consider a low-cost or free phone instead.
“My phone is locked.” Call the carrier you bought it from and ask them to unlock it. Pay off any balance if needed, then try again in a few days.
“Calls and texts work, but I have no internet.” Enter your APN settings (see above). This fixes it most of the time.
“I can’t send picture messages.” This is also usually an APN or MMS setting. Get the correct values from your provider.
“I don’t have a phone to bring.” Then BYOP isn’t your best path – take the free phone. Providers like AirTalk and Assurance include one when you enroll, and StandUp lets you buy a low-cost device.
The good things about bringing your own phone
There’s a lot to like about BYOP:
- You keep the phone you know. No learning a new device, no moving photos and apps.
- You can use a nicer phone. Free Lifeline phones are usually basic. If you already own a better one, BYOP lets you keep the good hardware and get free service.
- It can be fast. With eSIM, you can be connected in minutes.
- You keep your number. Your family, your job, and your doctor’s office can still reach you the same way.
- It saves money. You get free monthly service without paying for a new phone.
The limits and downsides to know
I promised to be straight with you, so here are the honest trade-offs:
- Your phone must be unlocked and compatible. If it’s locked and can’t be unlocked, or it’s too old, BYOP won’t work.
- You don’t get a free phone. The benefit covers service, not hardware. If your BYOP phone breaks later, replacing it is on you.
- Some features may need setup. A few things, like certain picture-message settings, may need to be entered by hand.
- eSIM isn’t everywhere yet. Not every provider or every phone supports it.
None of these are dealbreakers for most people. But it’s better to know them going in than to be surprised later.
BYOP or the free phone — which should you choose?
Here’s the simple way to decide:
- Choose BYOP if you already own a phone you like, it’s unlocked, and it passes the compatibility check. You’ll keep your device and your number and still get free service.
- Choose the free phone if you don’t have a phone, your current phone is locked and can’t be unlocked, or it’s too old to work on the network. There’s no shame in this – a free basic smartphone still gives you calls, texts, and internet.
Either way, you end up connected. That’s the whole point.
One more thing: watch out for scams
Because the free phone program is popular, scammers sometimes try to copy it. A real Lifeline provider will never charge you a fee just to “qualify,” and will never demand payment through gift cards or cash apps. Before you hand over your ID or documents, make sure the provider is legitimate. You can look up any provider in the official government (USAC) database – and we walk you through exactly how in our guide to spotting a Lifeline scam.
Quick Answers (FAQ)
Almost any modern, unlocked smartphone that works on your provider’s network. Check the IMEI and make sure it’s unlocked first.
Yes. A locked phone only works with the carrier that sold it. Ask that carrier to unlock it before you switch.
Yes, in almost every case. This is called porting, and it’s your right. Just don’t cancel your old service until the transfer is confirmed.
The monthly service is free (or low-cost) if you qualify for Lifeline. The benefit doesn’t pay for a phone, so BYOP simply saves you the cost of buying one.
An eSIM can be active in minutes. A mailed SIM usually takes about 3 to 5 business days to arrive, then activates the same day.
If it’s locked, unlock it. If it’s too old, consider a free or low-cost phone instead. Either way, you still get connected.
Final thoughts
Bringing your own phone to Lifeline is one of the smartest ways to use the program. You keep the device you trust, you keep your number, and you still get free monthly service. The only real homework is three quick checks: make sure you qualify, make sure your phone is unlocked, and run the IMEI check.
If those three pass, you’re most of the way there. When you’re ready, the next steps are simple: see if you qualify, then apply for Lifeline with a provider that supports BYOP – and keep using the phone you already love.