
TruConnect only offers a free phone to two groups – people approved for California LifeLine and people approved for the Enhanced Tribal benefit. Everyone else who gets approved chooses a SIM kit and uses a phone they already own. So if you were worried that “bring your own phone” meant a smaller deal, you can let that go. You get the same free service everybody else gets. The only difference is that the phone in your hand is already yours.
This guide walks through the whole process in plain steps: what you actually receive, the checks to do before you start, both activation paths, how to keep your number, and the one federal rule that quietly ends people’s service a month after they finally get connected. Everything here was checked against TruConnect’s own help pages and federal sources.
The short version. Confirm your phone is unlocked and works on T-Mobile’s network. Choose eSIM (same-day) or a mailed SIM card during enrollment. Activate by making a call, sending a text, or turning Wi-Fi off and loading a page. Then set up your account – and only after that, move your old number over.
What you actually get with TruConnect BYOP
Before you spend twenty minutes on an application, here is what the service includes.
TruConnect runs on T-Mobile’s network. It does not own towers; it rents space on them. In practice that means coverage close to T-Mobile’s, with speeds that may slow slightly during the busiest hours compared with a direct T-Mobile customer.
| Plan | Monthly data | Talk & text | Free phone offered? |
|---|---|---|---|
| Standard Lifeline (most states) | 4.5GB | Unlimited | No — SIM kit for your own device |
| California LifeLine | 6GB | Unlimited | Yes, for qualifying new customers |
| Tribal Lifeline | 10GB | Unlimited | Yes, for qualifying customers |
Every one of those plans also includes free international calling to more than 200 countries, which is genuinely unusual. Most Lifeline providers cover domestic calls only. If you have family in another country, that single feature is often the reason to choose TruConnect over a competitor.
And the benefits you get precisely because you kept your own phone: you keep the device you already know, with your photos, contacts, and apps in place; you keep your number if you want it; and if your phone supports eSIM, you can activate the same day you are approved instead of waiting for mail. All of it at $0 per month, with no contract, no credit check, and no deposit.
Before you start: three checks that take five minutes
Do these first. Nearly every failed BYOP activation traces back to one of the three, and finding out now is far better than finding out after your old service is already cancelled.
1. Is your phone unlocked?
A locked phone is still tied to the company that sold it, and no amount of correct SIM installation will change that. The fastest way to check takes under a minute:
- iPhone: Settings → General → About, then scroll to Carrier Lock. If it says “No SIM restrictions,” you are unlocked and good to go.
- Android: Settings → Connections (or Network & Internet) → Mobile Networks, and look for Network Lock. You can also open Network Operators and turn off “Select automatically” to see whether other networks appear.
If your phone is locked, call the company that sold it and ask them to unlock it. If it is fully paid off and the account is in good standing, they are generally required to. It usually takes a few days. (TruConnect follows the same kind of policy for phones it sells – it will unlock a prepaid device no later than one year after activation, provided the phone is not reported lost, stolen, or tied to fraud.)
2. Will it work on T-Mobile’s network?
Your phone needs VoLTE (voice over LTE) and T-Mobile’s main LTE bands — 2, 4, 12, 66, and especially band 71, which carries the signal indoors and in rural areas. Phones made before roughly 2016 usually fail the VoLTE test, and old Sprint phones will not work at all, since that network was retired years ago.
You do not have to decode this yourself. TruConnect checks your phone during enrollment using its IMEI number — the unique 15-digit ID that identifies your device. To find yours, dial *#06# and it appears on screen immediately. You can also find it under Settings, in the About section, or printed in the SIM tray. Write it down before you start the application.
If you want to confirm compatibility before applying, our guide to the best TruConnect compatible phones lists which models pass and which quietly fail.
3. Does your phone support eSIM?
This decides whether you wait for mail or get connected today.
- iPhone: Settings → Cellular → look for Add eSIM. If the option is there, you are set.
- Android: Settings → Network & Internet → SIMs → look for Add eSIM.
Most phones from about 2020 onward support it. This matters more than it used to: newer iPhones sold in the United States “the iPhone 14, 15, and 16 lines” are eSIM-only and have no SIM tray at all. If you own one of those, eSIM is your path. If your phone does not support it, nothing is lost; you simply choose the physical SIM kit instead.
Choose your path: eSIM or physical SIM
| eSIM | Physical SIM kit | |
|---|---|---|
| How fast | Same day you are approved | Arrives by mail, usually within days |
| Who can use it | BYOD customers with a compatible unlocked phone | Anyone with a nano-SIM slot |
| Where it works | Not available for Lifeline in Texas | Every state TruConnect serves |
| What you do | Scan a QR code | Insert a card into the tray |
Path A: Activating with an eSIM
This surprises people: it all happens inside enrollment rather than afterward. You are choosing your “device” while you apply.
- Start your application. Go to TruConnect’s Lifeline application page and enter your ZIP code.
- Select eSIM. When prompted to choose a device, pick eSIM rather than a phone or a SIM card.
- Enter your IMEI. This confirms your phone can take an eSIM. If it cannot, you will be offered a physical SIM instead – that is not a rejection, just a different envelope.
- Complete the Lifeline application. You will fill in your details and then be sent to the National Verifier, the federal system that confirms you qualify. This is the real gate, not TruConnect.
- Finish checkout and confirm your email. Double-check the address here. Every activation instruction and every problem notice goes to it.
- Scan the QR code. Once approved, you receive activation instructions by email. Scan the code, let the profile install, and restart your phone if the signal does not appear right away.
A helpful detail: after approval you can activate on the phone you enrolled with or a different one. So if you change your mind about which handset to use, you are not locked in.
Path B: activating a physical SIM kit
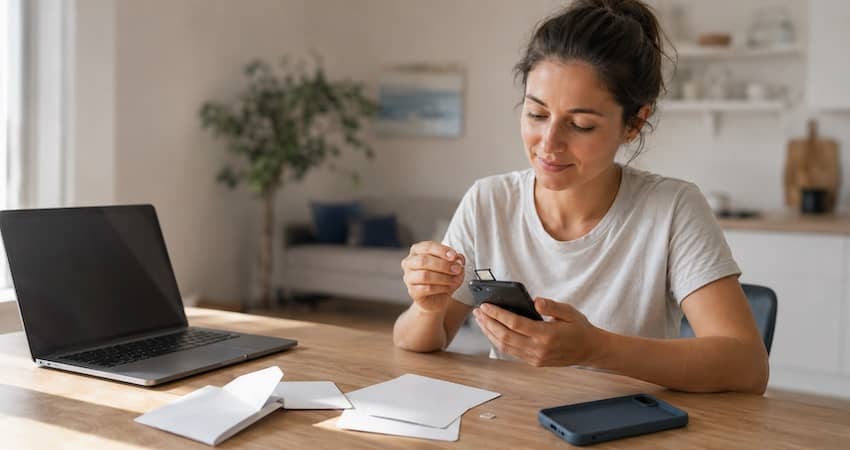
TruConnect mails a small envelope with a SIM card and a metal tool about the size of a paper clip. Here are their own five steps, in plain language.
- Open the kit and turn your phone off. Do not skip powering down. Swapping a SIM on a live phone is the most common cause of “no service” afterward.
- Pop out the SIM tray. It is usually a small slot with a pinhole on the side of the phone. Push the pointed end of the tool into the hole and the tray slides out. On some older phones you remove the back cover instead – your user manual will say.
- Punch out the right SIM size. The card comes in a frame with three sizes: standard, micro, and nano. Push out only the one that fits your tray. Almost every modern phone uses nano. Once you push out the wrong size, you cannot put it back.
- Slide the tray back in and power on. The gold contacts face down on most phones, and the notched corner lines up only one way. If it will not seat flat, turn it around rather than pressing harder.
- Activate by using the phone. Make a quick call, send a text, or turn Wi-Fi off and load a web page. That is the activation. There is no separate button to press.
That last step is the whole thing. A lot of people install the SIM correctly, see no confirmation message, assume something went wrong, and set the phone aside. Your first call or text is the confirmation. Make one right away.
If your service still does not come alive after a restart, TruConnect’s care team is at (800) 430-0443, Monday through Saturday, 5:00 a.m. to 9:00 p.m. Pacific. You can also dial 611 from the TruConnect line itself. For the full walkthrough, including phones that came from TruConnect, see our TruConnect activation and troubleshooting guide.
Set up MyTruConnect (do not skip this)
People put this step off, then need it urgently at the worst moment — because your number transfer, your data top-ups, and your account notices all live here.
- Go to my.truconnect.com, or install the MyTruConnect app from Google Play or the App Store.
- Choose “First Time Here?” and enter your new TruConnect phone number.
- Accept the Terms and Conditions and Privacy Policy, tick the box, and select Sign Up.
- Do not close the page. A text arrives with a one-time TruConnect code, and you finish signing up on that same screen.
- Enter the code and create a password with at least one capital letter, one number, and one special character such as
$or&.
Bringing your old number with you
You can keep your number. The catch is the order of operations, and getting it backwards is how people lose a number they have had for years.
Do not cancel your old service first. A phone number can only be transferred out of an active account. The moment you close the old line, the number is released, and it is usually gone for good. Let the old service run until the transfer finishes, then cancel.
The correct sequence:
- Activate your TruConnect line first. TruConnect requires an active plan before it will accept a transfer request. You will have a temporary number for a day or two – that is normal.
- Get two things from your old provider: your account number and your number transfer PIN (sometimes called a port-out PIN). Most carriers show these in your online account; otherwise call and ask. Copy them exactly – small mistakes cause most porting delays.
- Check your email address in MyTruConnect. Any problem with the transfer is reported there and nowhere else.
- Submit the request through your MyTruConnect account or the app. Once TruConnect confirms the number is eligible, select Transfer.
- Wait. Depending on your old carrier this takes anywhere from a few hours to three business days. Restart your phone when it completes.
Also pay off any balance you owe the old carrier, since an unpaid account can block the transfer. Afterward, sign in to MyTruConnect with your transferred number and the password you already made – you do not create a second account.
For the wider rules that apply no matter which company you are moving to, see our guide on keeping your phone number when you switch Lifeline providers, and our full walkthrough on how to switch Lifeline providers.
When something does not work
No service at all after inserting the SIM
Restart the phone. If that fails, turn airplane mode on for ten seconds and back off to force a network search. If it still fails, power down, reseat the SIM, and check that it is sitting flat and that the slot is free of dust. Only after all three should you assume a bad SIM and if it is, our guide to replacing a TruConnect SIM card covers the swap. A line that never comes alive at all may simply need to be provisioned on TruConnect’s end, which only support can do.
Calls and texts work, but there is no internet
This is the classic BYOP symptom, and it is almost always your APN settings – the small configuration that tells your phone how to reach the data network. A phone that came from another carrier often keeps that carrier’s settings.
Try the easy fixes first: restart, then toggle airplane mode, which prompts most phones to pull the correct settings automatically. On iPhones the settings usually configure themselves once the line is live.
On Android you will find the field at Settings → Network & Internet (or Connections) → Mobile Networks → Access Point Names. On iPhone it is Settings → Cellular → Cellular Data Network. Have that screen open when you call, save the settings, and restart the phone before testing again.
The activation is rejected outright
Three usual causes: the phone is still carrier-locked; it is still on a payment plan or reported lost or stolen (which blocks the IMEI at the network level, so no carrier can activate it); or it lacks the bands TruConnect needs. First, re-check that you entered the IMEI correctly. The lock is fixable, the payment or theft flag must be resolved with whoever holds the account, and the band problem is not fixable – but it is not the end of the road, since some other Lifeline companies still ship a free device. Compare them in our best Lifeline providers comparison.
Picture messages will not send
MMS uses a separate configuration from regular data, so it can fail on its own while everything else works. Same fix, same phone call.
The 30-day rule that quietly ends benefits
This one is federal, it applies to every Lifeline provider, and it catches more people than any technical problem on this page.
Because your service is free and you pay nothing each month, you are required to use it at least once every 30 days. Under the FCC’s rules, if 30 consecutive days pass with no usage, your provider must send a notice giving you 15 days to use the service. If you still do not, you are de-enrolled.
“Usage” is a low bar – a call, a text, a bit of data, or answering the provider when they check in. The problem is that BYOP customers are unusually exposed. If you keep a second phone as your main one, or your TruConnect line lives in a drawer for emergencies, the clock runs quietly in the background.
A one-minute fix. Set a monthly reminder to send yourself a text from the line. That single habit prevents the most common cause of lost Lifeline service in the country.
If your service has already stopped, do not reapply from scratch yet. Read our guide on what to do when a Lifeline application is denied or service ends, and check your annual recertification status while you are at it – from the outside, the two problems look identical.
Honest expectations: what BYOP does not include
You deserve the full picture before you commit.
- No free phone unless you qualify for California LifeLine or the Enhanced Tribal benefit. The SIM kit is the offer everywhere else.
- No repairs or warranty on a phone you already owned. TruConnect’s replacement program covers devices it supplied. If your own phone breaks, see the options in our guide to the best free Lifeline phones or our page on getting a TruConnect replacement phone.
- Data is capped. 4.5GB on the standard plan is real but modest — enough for messaging, maps, job applications, and email, but not daily video streaming.
- TruConnect does not serve every state. Lifeline plans are unavailable in Oregon, Maine, New Hampshire, Connecticut, Delaware, Washington D.C., and North Carolina. If you live in one of those, you need a different provider, and our provider comparison is the place to start.
One thing to know before you apply
Your Lifeline approval comes from the federal National Verifier, not from TruConnect. Two consequences worth planning around:
- Your approval expires after 90 days if you do not complete enrollment with a provider. This explains most “I applied months ago and heard nothing” stories.
- California and Texas work differently. Since February 1, 2026, Californians must complete two separate applications – the federal one through the National Verifier and the state California LifeLine one through the CPUC. Texas uses its own state process rather than the federal portal. Our California and Texas guides walk through both.
Not enrolled yet? Start with who qualifies for Lifeline in 2026, then how to apply, step by step. Already applied and waiting? Here is how to check your TruConnect application status. And if this is all new to you, our overview of what the Lifeline program is explains the whole benefit.
A short word on staying safe
People searching for free phone service get targeted constantly. Three rules will keep you out of trouble:
- Nobody may charge you to apply for Lifeline. Not a fee, not a “processing charge,” not a deposit. The application is free, always.
- Never give your number transfer PIN to anyone who contacts you first. That PIN is what moves a phone number, and handing it over is how SIM-swap fraud starts. You give it to the company you called, and nobody else. Only ever enter your details on official pages – truconnect.com, my.truconnect.com, or the official app.
- Verify any company yourself at lifelinesupport.org/companies-near-me. If it is not listed, it is not an approved Lifeline provider. Our guides on verifying a Lifeline provider and spotting Lifeline scams show you exactly what to look for.
Frequently asked questions
No. Your phone must be unlocked and compatible with the T-Mobile network that TruConnect uses — that means VoLTE support and T-Mobile’s LTE bands. TruConnect checks this with your IMEI during enrollment.
No, and that is the point of BYOP — you use the phone you already have. TruConnect only offers a free Android phone to customers approved for California LifeLine or the Enhanced Tribal benefit. Everyone else chooses a SIM kit.
Newer iPhones sold in the United States (the 14, 15, and 16 lines) are eSIM-only and have no SIM tray. TruConnect now offers eSIM for Lifeline in most states, though not in Texas, so confirm your option during signup.
Dial *#06# on the phone and it appears on screen immediately. You can also find it under Settings, in the About or About Phone section.
Yes, if your phone supports eSIM and you select eSIM during enrollment. You scan a QR code instead of waiting for a SIM card in the mail. Lifeline eSIM is not available in Texas, and TruConnect’s own pages currently disagree about California, so check during the application.
You can, in most cases. Activate your TruConnect line first, then request the transfer through your MyTruConnect account using your old account number and transfer PIN. Keep the old service active until the transfer finishes, or the number can be lost permanently. It usually takes a few hours to three business days.
Restart the phone, check that the SIM is seated or the eSIM finished installing, and toggle airplane mode to force a network search. If it still shows no service, contact TruConnect at (800) 430-0443 — the line may need to be provisioned on their end.
This is nearly always the APN settings, which a phone often keeps from its previous carrier. Restart and toggle airplane mode first, since most phones then pull the correct settings automatically. If that fails, call TruConnect and ask for the current APN values rather than copying them from a website, because published values vary and a wrong entry stops data completely.
Federal rules require free Lifeline service to be used at least once every 30 days. After 30 days of no usage you receive a 15-day notice, and if you still do not use the service you are de-enrolled. A single call, text, or bit of data resets the clock.
LifelineFree.com is an independent resource. We are not a phone provider, not a government agency, and not affiliated with TruConnect or any other company. We do not take payment to recommend a provider. We publish this information so people can find a safe, legitimate way to get connected. Please confirm current plan details and support hours on TruConnect’s website for your state before you enroll.